Friday, October 20, 2017

When Genealogy meets Quilting

When I'm not occupied with making quilts, I'm very likely to be researching ancestors.  On my Italian side, I learned that prior to immigrating to the U.S., my grandfather lived in Santa Domenica Vittoria in Sicily.

Earlier this year, while on vacation in Italy, my brother and his wife visited Santa Domenica and took  this photo of the beautiful stonework streets.

Of course, as a quilter, my first thought was to make a quilt from the pattern.   I brought a copy of the photo to my local quilt shop and picked out these fabrics:

Then I set about using Electric Quilt software to come up with a pattern. I decided to make a table runner.  I did a little virtual design, and  also did some old school cutting and pasting and came up with this:

Here is a portion of how it all came together:

It's not quilted yet, but I expect to have it on my table soon.


post signature

Monday, September 18, 2017

Long Time Gone Rogue, at last

I had most of the parts of Long Time Gone finished, and it was time to make some decisions about how to handle the small filler spaces.  I started with the bottom right corner:

The pattern called for a double row of a checkerboard to fill in the bottom, so I made two rows of squares and laid it all out on the bed:


Then I thought, "why not separate those rows and put one above and one below the Flying Geese row?

I really liked the way that looked, and I decided to move the whole section up to the top:

The last big decision to make was choosing the sashing fabric.  I thought a medium value neutral would be a good choice to set off both the light and dark sections.   I cut a few strips and tried them out:

Nope.  Made the whole thing too muddy.  I decided that a light tone-on-tone fabric with a tiny print flower would be a better choice.

With the major decisions done, it was time to start sewing the whole thing together.  The quilt is constructed in 6 large sections which are then sewn together. At last,  after 6 months of work, and over 2,500 pieces, here it is:

 It was the most challenging thing I have ever undertaken, but I enjoyed it immensely, and it was certainly never boring.   I don't think the photo does it justice, quite frankly.

After all the sorting and cutting, my previously organized stash of Civil War Repro fabrics looks like this:
At least I managed to keep the lights and darks in separate piles. 


Of course, I still have to figure out how it will be quilted, and I will add some kind of border,  but for now, I'm enjoying just seeing it all in one piece on the bed in the spare room.


post signature

Friday, September 1, 2017

Bird's Eye View

Progress stalled on Long Time Gone because the various parts had outgrown the spare bed.

I wanted to see  how all the pieces were going to look when joined in the final layout, but didn't want to resort to working on the floor.

Luckily, my quilting friend, Rosemary had a portable design wall, and she let me borrow it.  At last, I could spread out the quilt components in their proper places and  see how things were going to look.

Most of what was left was to make were little filler blocks, but the one large area in the center of the bottom half was reserved for 4 half-log cabin blocks.    I turned to my scraps, and selected the strips for the dark half of the log cabins;

Little by little, I started building my half-log cabin blocks, trimming each step as I went.

It took  a few rounds before the familiar log cabin started to emerge.

After a few more rounds, I had my four log cabins ready to go.   I'm not yet sure which way I will rotate them in the final layout.  Here are a couple of options:
Here is how the design wall looks so far:

There are a few empty areas on the quilt will have filler blocks to fill in the spaces.  I turned to the collection of small squares that I had been making all along in anticipation of the filler blocks, and began experimenting.

Lots of little squares to play with.
 I'm so glad the day was cool enough so I did not have to turn on the fan!

The pattern called for a checkerboard effect as shown on the right, but I kind of liked the totally scrappy look on the left.

In the end, I created these:
I also made a couple of other filler blocks as well that I don't have individual photos of.

I'm just about done making all the units I need to complete the top, except for the sashing.

Number of pieces in the Log Cabin blocks:  60
Number of pieces in the filler blocks:          179
Number of pieces in the quilt so far:          2414


post signature

Monday, August 14, 2017

Make way for Pineapples!

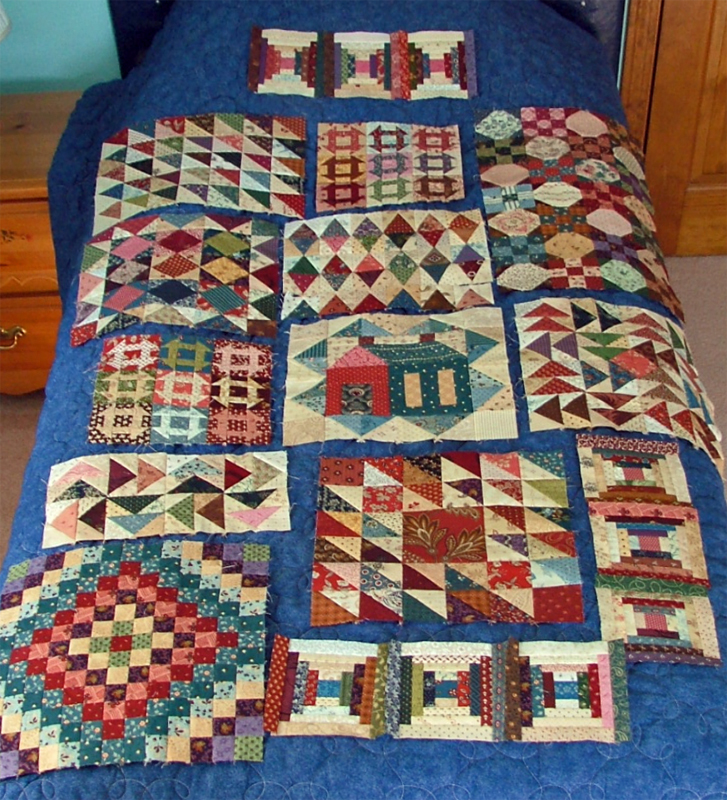
At this point in the process of making 
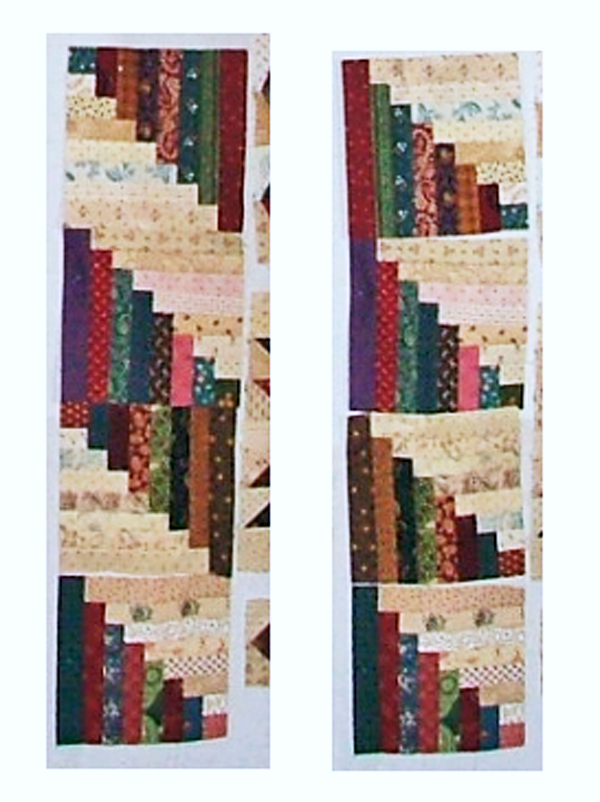
Long Time Gone, I had two last sections to make, the Log Cabins blocks and the Pineapple blocks.  I decided to address the Pineapple Blocks first.

I needed 16 Pineapple blocks. They have a finished size of 5 inches, and each block contains 33 pieces. It seemed like a big mountain to have to climb.  The pattern includes a printed pattern to paper piece the Pineapples, but I was hoping to find a better option.  (All that paper to tear out at the end?  Not if I can help it.)

I found the perfect solution in this new-to-me ruler:

It's called the Pineapple Trim Tool and is made by Creative Grids.  I asked my local quilt shop to order one for me.  I couldn't wait to try it out, but before I did, I gathered all my scraps from the blocks I had made so far.  I had quite the collection by now.  There were all these Light fabrics,

all these Dark fabrics,

these leftover triangles from the Flying Geese blocks,

these leftovers from the 60 degree triangle blocks,
and a whole basket of 1.5 inch squares that I had cut along the way from anything that was too small to use elsewhere.

For each Pineapple block, I started with one of the 1.5 inch squares for the center, and sewed a scrap of Light fabric to each side.

Here is what I ended up with:

Then it was off to the cutting table to try out the new ruler.  I lined up the central square with the white box on the ruler and trimmed the first side:

Then rotated the block 3 more times and trimmed each side until I had a nice square in a square.

How cute are these?

At this point, I took one of the centers and finished the Pineapple block, just to learn how it all worked.   I did the other 15 blocks in one batch,  assembly line fashion.

After the first round of light fabrics is done, you sew a dark fabric to each side:

This time, you trim using the other part of the ruler.  You line up the center square on a black box on the ruler and trim two sides:

Then you rotate the block and trim the other two sides:

Now I had 15 of these little darlings all ready for the next round:

I added another round of Lights, and another round of Darks.  Even with the ease of the Quick Trim ruler, it took me more than an hour to sew, press and trim each round.

Here is one more round of Lights completed:

And one more round of darks.  The  untrimmed blocks were now bigger than my test block.  Surely this must be the last round?

Nope. Not yet.

One last round of Lights:

At last it was time for the final round of triangles.   I wanted to save myself from having to worry about two  triangles ending up next to each other in the final arrangement, so  I went through all my dark fabrics and cut one triangle from the corner of each one.


At last I was ready for the last step.  One final round of sewing, pressing and trimming later, and I had finished my 16 Pineapple Blocks. The whole process had taken about 4 days, but I am very happy with them, and think they were worth it.


I'm also very happy to say the my scrap pile actually did diminish. These blocks really are scrapbusters. Here is what was left of my Light fabrics when I was done, and I still have the Log Cabin blocks left to make:

With 33 pieces of fabric in each block times 16 blocks, there are 528 pieces in the Pineapple blocks,  bringing the total number of  fabric pieces in this quilt to over the 2000 mark!

Number of pieces in the Pineapple blocks:  528
Number of pieces in the quilt so far:    2175


post signature

Monday, July 31, 2017

Pandora's Box


It turns out that once you give yourself permission to make a few changes to a pattern, then it's easier than ever to make a few more.  It's like opening Pandora's Box.  Any little thing that you might have any doubts about becomes fair game for substitution.

I started with the blocks in Long Time Gone called "Crosses of the UK" which look like this:

I'm just not crazy about the way the blue foreground cross and the red background cross look unbalanced.  Also, it looks to me like a round peg was jammed into a square hole and the points got chopped off, (but I"m sure that's just me.)

Anyhow, I decided the Crosses would go, and a Sawtooth Star would be their replacement.

Long Time Gone requires 6 crosses stars all together, that are sewn into the quilt in two rows of 3.  For the first row of stars, I chose the fabric for the large block in the center, and then surrounded them with scrappy squares:

After sewing them up, I ended up with these:

For the second row of stars, I started with some busy prints for the 3 center squares and surrounded them with squares from the same color family:

Here is how they looked in progress:

And here are the two finished rows:

Now for the next substitution...

The pattern also calls for 2 Bow Tie blocks like this one:

The Bow Tie pattern is fine, but compared with the tiny pieces all the rest of the blocks, they looked too big to me.  Here's an idea of scale of the Bow Tie blocks compared to the others.

Whenever I looked at the pattern, my eyes were drawn to the large gaping hole in the center of the Bow Tie block, ( but I'm sure that's just me!)  I decided to substitute a Bear's Paw block which has that nice little square in the center, and also lots more opportunities for additional fabrics:

I needed two blocks, so I started by picking the fabrics for the larger squares:

then I cut the rest of the smaller squares using bits and pieces from the scrap pile.

Here are my two finished Bear's Paw blocks:

Then, I made one final substitution.

The pattern calls for a set of 9 4-inch Jacob's Ladder blocks like these:

No matter how I played around with the color placement, I just couldn't settle on something I liked. It was too directional with those longer diagonal pieces. (again, probably just me!)   Now that Pandora's Box was opened, I figured one more substitution didn't matter.  It was my quilt and I had to like it when I was done, right?  I decided to substitute a set of 12 3-inch Broken Dishes blocks instead:

There you have it.   My quilt will be roughly 80% as the pattern is written, and about 20% of my own design changes.  I guess from now on I have to call this quilt Long Time Gone Rogue!

Number of pieces in the Sawtooth Stars:  102
Number of pieces in the Bears Paws:         90
Number of pieces in the Broken Dishes:   64
Number of pieces in the quilt so far:     1,647


post signature